

You've got last year's foam tombstone in your hands, and it's doing exactly what cheap garden props always do after one wet weekend. The paint's gone chalky, the base has softened, and the whole thing has either leaned into the border or snapped where the wind found it first. That's the normal failure pattern for halloween decorations gravestones, not a sign you built badly.
The good news is that the fix isn't complicated. A gravestone that survives October in Britain comes down to the right base material, a finish that seals, and an anchoring method that matches the ground it's going into. The same logic applies whether you're building a full yard haunt or a small gothic shelf piece that only needs to look convincing for a few weeks.
Table of Contents
- Why Most DIY Gravestones Do Not Survive the Season
- Choosing the Right Base Material
- Shaping, Carving, and Aging the Surface
- Weatherproofing and Anchoring for UK Gardens
- Styling Mini Gravestone Displays in Small Spaces
- Fire Safety and Cemetery Rules Worth Knowing
- Your Halloween Gravestone Checklist
Why Most DIY Gravestones Do Not Survive the Season
The first bad sign usually appears before the end of the first rainy spell. A foam gravestone that looked crisp on Saturday starts to look tired by Monday, with paint soaking into the face, lettering blurring, and the bottom edge taking on that soggy, crushed look that says the material has given up. The problem usually isn't decoration, it's the choice of raw material and the way it handles moisture.
The failure starts under the paint
Plain foam is easy to cut, but it's also the least forgiving when you put it in a real garden. If the surface isn't sealed, spray paint can bite into it, acrylic lettering can soften, and the whole thing can start looking like a craft-store offcut rather than a stone. A flat base without stakes or weight is just as unreliable, because soft ground and gusty weather don't care how neatly you carved the inscription.
Practical rule: if water can sit in a groove, crack, or cut edge, the prop will age badly unless you seal and raise it properly.
What people call a “failed” tombstone is often just a prop built for indoor use and sent outside anyway. That's why the same piece can look fine on a porch photo and miserable in the border after one weekend. The article's promise is simple, build for the weather you have, not for the weather you hope for.
A small display has the same risk, just on a different scale. A tabletop stone with a rough surface, unsealed cut lines, or a flimsy base can still flake, slump, or mark nearby fabric if it's placed beside candles or damp moss. The shape changes, but the material problem stays the same.
Choosing the Right Base Material

The base material decides almost everything. It affects how the tombstone cuts, how much it weighs, how real it feels in the hand, and whether it still looks decent after the first cold rain. For most halloween decorations gravestones, I'd rank the common choices by practicality rather than fantasy.
Foam, plaster, clay, resin, stone
Extruded polystyrene foam is the cheapest and lightest option. It cuts easily with a hot wire or serrated knife, but it dents fast and needs sealing before it sees the garden. XPS insulation board, the pink or blue stuff, is denser and carves cleaner, so it takes stone texture better and holds edges more neatly.
Plaster-of-Paris over a cardboard armature gives more weight and a more convincing feel in the hand. It's better for a prop that's meant to stand still on a shelf or against a wall, but it needs patience while drying and can crack if it's dropped. Air-drying clay and cast-stone style pieces suit small tabletop memorials where realism matters more than speed.
Practical rule: use foam when you want size, plaster or clay when you want presence, and real stone or dense resin when you want the piece to stay put outdoors.
For a compact display, a digital print such as Goddess of the Moon & Spirit Animals can sit behind a tiny gravestone and give you the same moody tone without taking more floor space. Mystic Harmony also sells small resin figures that fit micro scenes, which works better for desks and trays than trying to force yard-haunt scale onto a bookshelf.
The easiest way to choose is to match the material to the setting. Foam is still fine for a temporary garden scene if you're willing to seal and stake it properly. For shelves, tiered trays, and covered porch corners, a denser cast piece or plaster build usually feels more finished.
| Base Material Comparison for DIY Gravestones | Durability | Cost | Weight | Skill Level | Best For |
|---|---|---|---|---|---|
| Extruded polystyrene foam | Low to moderate | Low | Very light | Beginner | Large yard props, fast builds |
| XPS insulation board | Moderate | Low to moderate | Light | Beginner to intermediate | Cleaner carved edges, better texture |
| Plaster-of-Paris over armature | Moderate | Low to moderate | Heavy | Intermediate | Indoor props, sheltered displays |
| Air-drying clay | Moderate | Moderate | Medium | Intermediate | Small tabletop stones, detailed lettering |
| Dense resin or cast-stone style pieces | High | Higher | Heavy | Intermediate to advanced | Weather-stable garden pieces |
| Real stone | Very high | High | Very heavy | Advanced | Permanent memorial-style look |
I'd keep dust masks and eye protection handy when cutting or sanding foam, plaster, or clay. Fine particles travel farther than people expect, and the cleanup is never as easy as the project video makes it look.
Shaping, Carving, and Aging the Surface
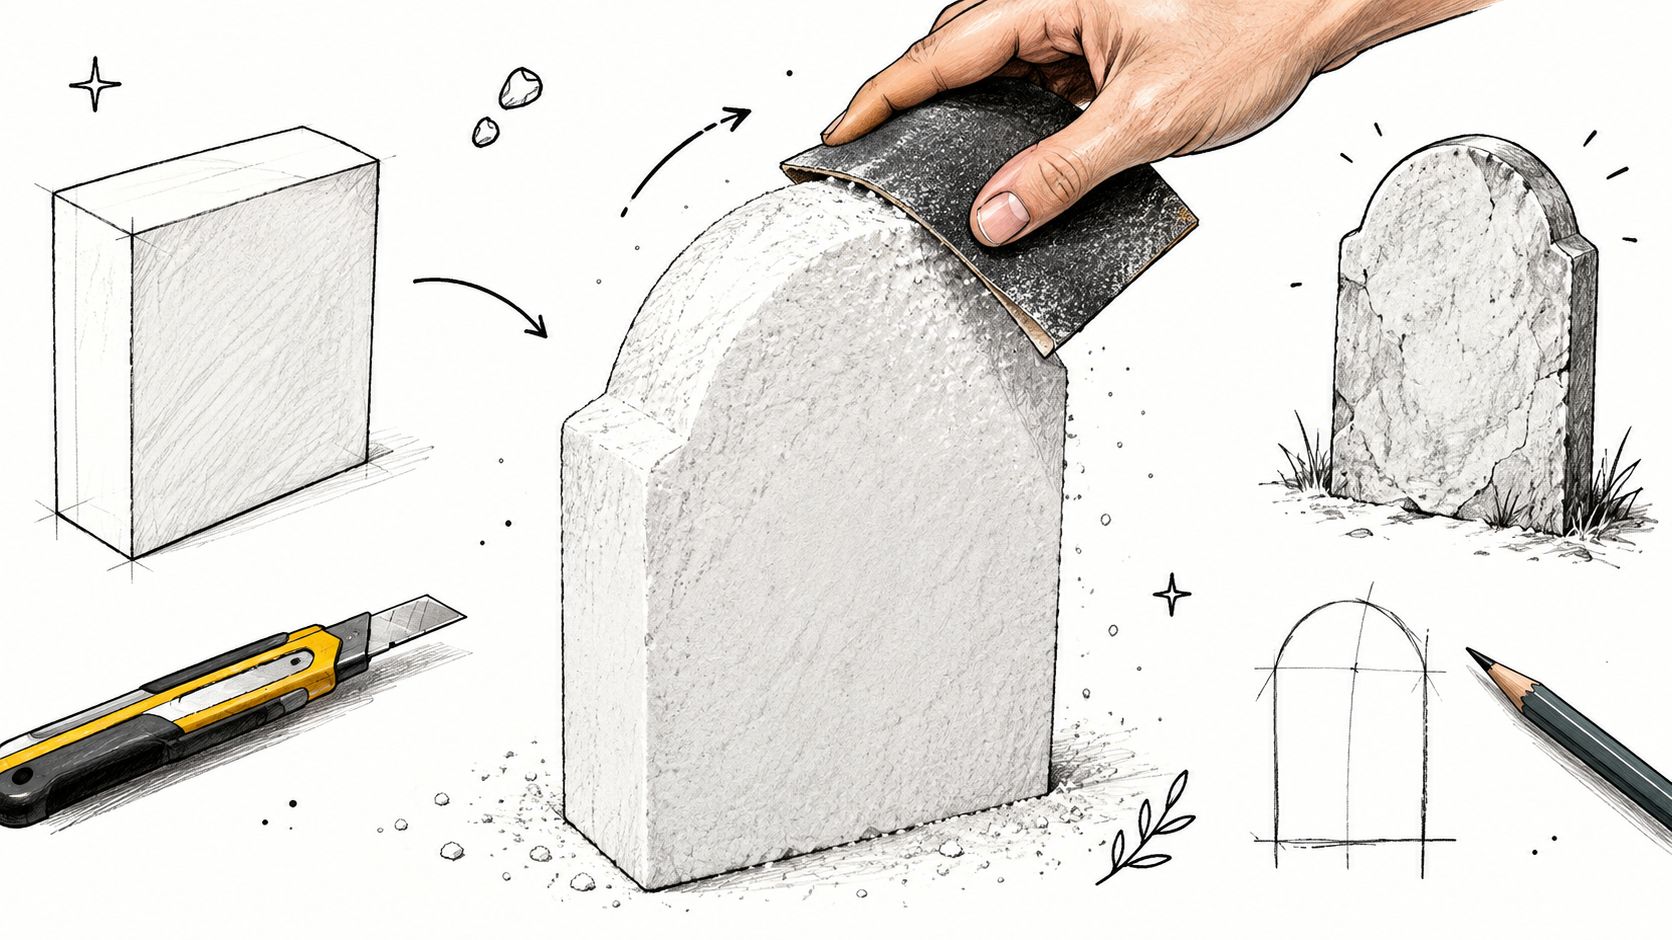
A fresh-cut block looks like a fresh-cut block, so the main job is turning it into something that reads as old stone. I start by deciding whether the piece should feel plain and weathered or ornate and Victorian. A rounded top with softened shoulders gives you an older parish-yard look, while a sharper shoulder and slightly angled top edge feels more formal and helps shed water.
Shape first, detail second
The silhouette matters more than the inscription. If the outline looks convincing, the piece will read correctly from across the garden even before anyone notices the wording. For lettering, a blunt stylus or the rounded end of a screwdriver gives better control than a blade, because it compresses the foam instead of tearing through it.
A wire brush dragged lightly over the face can help create a stone-like grain. Then I'll stipple the edges with a damp sponge to fake chips and wear, especially where a real stone would have been handled or weathered. The trick is to work in layers, because one heavy pass usually looks artificial.
The other half of the illusion is the finish. A diluted PVA coat or a matte primer gives the surface something to grip, and that matters before any grey spray goes on. Without that barrier, the paint can bite too hard, soften the foam, or leave shiny patches that never quite read as stone.
Use this sequence: carve, texture, seal, base coat, then grime wash. If you reverse the order, you spend twice as long fixing the finish.
I like a dry-brushed black wash in the carved letters and around the lower edges, then a quick buff on the raised areas with a dry cloth. That gives depth without making the piece look muddy. If you want a smaller indoor version, the rustic shelf-sitter style of 2D wooden cat blocks Halloween wooden rustic shelf sitter rustic fall tiered tray decor desktop decor Halloween gifts sits nicely beside a mini gravestone and keeps the palette in the same gothic lane.
The surface should suggest age, not damage. If every edge looks equally distressed, the whole thing starts reading as prop foam instead of old memorial stone. Pick a few high-contact areas and let the rest stay calmer.
Weatherproofing and Anchoring for UK Gardens
British weather punishes shortcuts. A finish that looks fine in dry air can fail the moment October turns damp, and a prop that feels solid on paving can lean over the second it meets soft soil. The best weatherproofing choice depends on how permanent you want the display to be and whether the stone is staying under cover or living in the open.
Finishes that actually hold up
Exterior masonry paint over a primer coat is the most forgiving option for a garden prop, because it's made to deal with damp walls and rough conditions. Matte clear acrylic varnish works better as a top layer on smaller, less exposed pieces, though it can still show wear if the prop sits in a wet bed for long. Diluted PVA is only a short-term fix, useful for quick indoor or sheltered displays, not for something that's meant to face repeated rain.
For resin bases, a two-pack epoxy finish gives a tougher shell, but it's more of a committed build than a casual weekend job. The main point is that water ingress plus freeze-thaw cycling is what cracks lower-density materials, while unanchored pieces usually fail from simple wind tipping. If a prop has carved cracks or open seams, water sits there and does the damage.
| Finish or Fixing | Weather Resistance | Best For |
|---|---|---|
| Exterior masonry paint over primer | Good for damp outdoor use | Foam or plaster props in gardens |
| Matte clear acrylic varnish | Moderate | Smaller pieces, sheltered displays |
| Diluted PVA | Low | Short-term indoor or covered setups |
| Two-pack epoxy | High | Resin bases and tougher small props |
| Garden stakes through foam | Good | Lightweight lawn pieces |
| Sandbag collar | Moderate | Temporary pieces on flat ground |
| Rebar pinned through drilled resin | High | Heavier outdoor stones |
| Weighted planter base | High | Porch corners and sheltered beds |
Placement does as much as the coating
A sheltered fence line, porch overhang, or a bed that isn't fully exposed will always extend the life of the piece. If you've only got a windy lawn, give the gravestone a wider footprint or hide weight inside the base. Flat-bottomed pieces catch gusts more easily than people think, especially when the surface is broad and the display is light.
The practical habit is simple. Seal the stone, anchor it, and keep any carved recess from becoming a tiny water tray. That does more for longevity than another pass of grey spray ever will.
Styling Mini Gravestone Displays in Small Spaces
A lot of readers don't need a graveyard. They need a corner of a shelf, a desk, or a porch table that feels eerie without swallowing the room. That's where gravestone styling gets more interesting, because a single small piece can carry the scene if the supporting objects are chosen carefully.
Make the stone the anchor, not the whole story
A compact resin stone around 12 cm tall can do the work of a much larger prop when it's paired with a few restrained accents. Black taper candles, dried eucalyptus, a tarnished brass key, and a cloche over faux moss give the display depth without clutter. If you want a miniature scene feel, a few figurines from the 6pcs Halloween Resin Skeleton Mummy Figurines line can tuck beside the stone and make the scene feel intentional rather than random.
Tiered trays work best when the tallest piece sits at the back, smaller objects sit in the middle, and the front edge stays low. A couple of micro pumpkins, one gravestone, and a battery tealight are enough if the colour palette is disciplined. I'd keep most of the scene in chalky white, soot grey, bone, and one accent like dried-blood red.
Keep the palette tight. Too many shiny finishes, bright oranges, or novelty plastics break the gothic mood faster than scale does.
Three compact looks that hold together
A haunted apothecary uses amber glass, a tiny mortar and pestle, and dried herbs. A Victorian mourning shelf leans on lace, a cameo frame, and one formal stone shape. A modern minimalist gothic setup strips it back to matte black candleholders, a single stone, and one line-drawn print on the wall behind it.
Those themes work because they solve the same problem in different ways, they give the eye a few consistent cues and stop the display from looking like leftover Halloween stock. Small-space decorating has become more refined in tone, and gravestone-style pieces fit that shift far better than oversized lawn scenes. In a flat, the mood comes from restraint.
Fire Safety and Cemetery Rules Worth Knowing
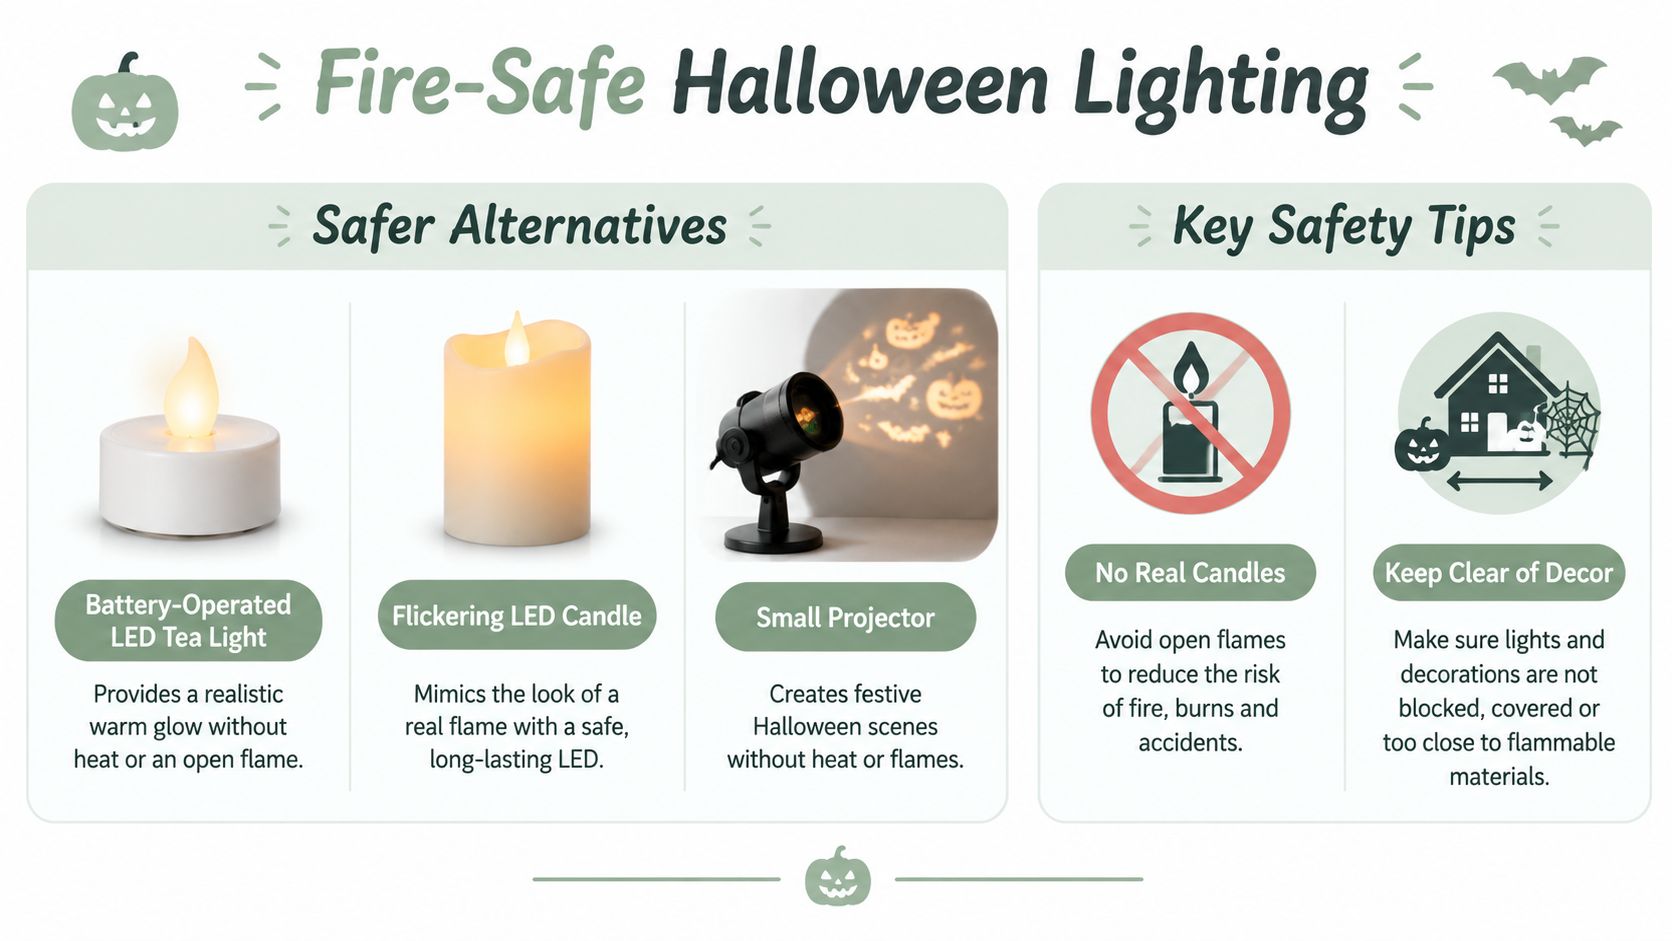
For indoor and sheltered displays, battery-operated LEDs beat real candles every time. A flickering tea light or small projector gives the same glow without the flame risk, which matters if your arrangement includes dried flowers, fabric bunting, foam, or paper details. Keep anything electrical away from curtains, plugs, and clutter, and don't leave charging batteries unattended.
Real graves are not Halloween props
The cemetery angle gets skipped far too often. In many council-run cemeteries, rules can prohibit items people casually associate with grave styling, including scary figures, artificial lighting, battery or solar ornaments, toys, glass, fencing, stones, and anything that extends outside the grave area. Some authorities also reserve the right to remove anything they judge excessive, offensive, unsafe, or disruptive to maintenance.
That means decorating an actual churchyard or local authority cemetery without permission isn't a harmless seasonal flourish. A safer route is a private garden display, a licensed Halloween event, or a printable backdrop at home. If you rent, check with the landlord or freeholder before staking anything into shared ground.
Simple rule: if it's a real burial site, don't assume seasonal decorating is allowed.
The same caution applies indoors when a display uses lights. Use UKCA or CE-marked electrical products where appropriate, keep cables neat, and treat battery packs like any other power source, not like decor. Safe design is part of good design here.
Your Halloween Gravestone Checklist
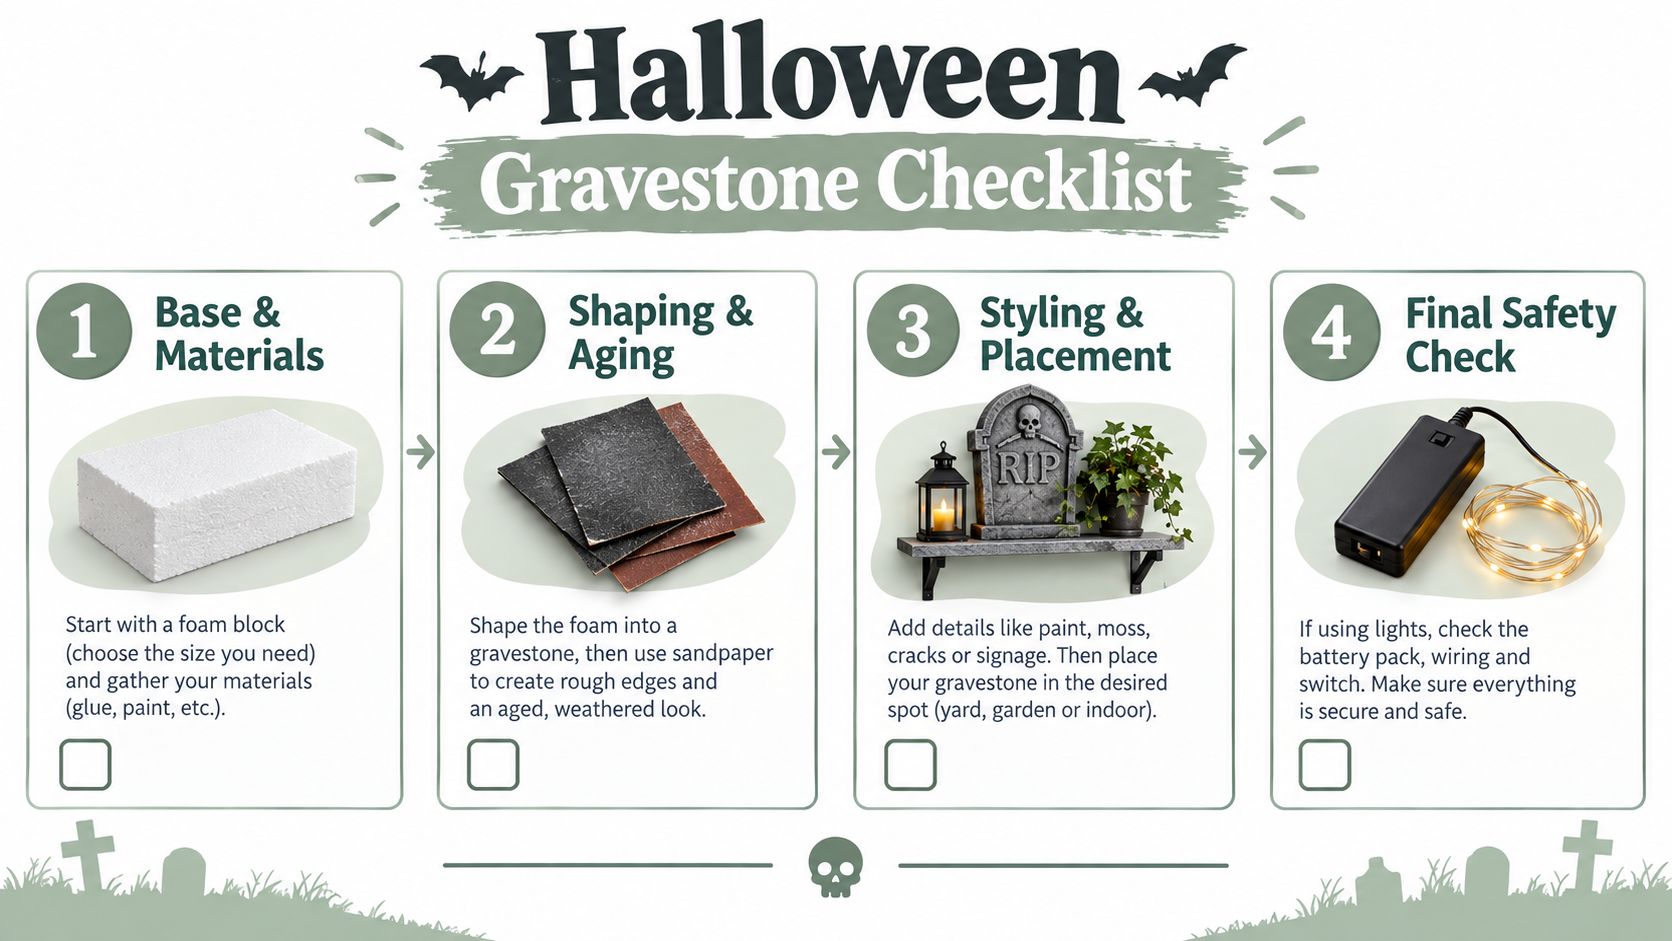
Before Halloween night, run through the build in one pass. The base should be chosen for the setting, the foam or resin should be sealed, the carving and ageing should be done, and the base coat should be fully dry before it ever goes outdoors. If the piece is going into the garden, the weatherproofing layer needs to be complete and the anchoring method fitted, not just planned.
The last checks that save a display
Battery LEDs only, no real candles near foam, and no decoration sitting in the path of feet or wheels. Small displays look stronger when grouped in odd numbers, and they read better when one piece is clearly the focal point instead of everything competing at the same height. A quick phone photo in low light is worth taking too, because it shows patchy paint, glare, and awkward spacing more clearly than daylight does.
If the display still looks off in the photo, the problem is usually contrast, not size. Darken the lettering, raise the base, or remove one object rather than adding more. That's usually the point where a good gravestone scene stops looking like a craft project and starts looking finished.
Mystic Harmony focuses on compact seasonal décor, small resin figures, and print-friendly pieces that suit shelves, desks, trays, and other limited spaces. If you're building halloween decorations gravestones in a smaller footprint, visit Mystic Harmony to find pieces that fit a gothic vignette without taking over the room.
Written with Outrank