

You've got a starter kit on the kitchen table, one eye on the instructions and the other on the open window because it's cold outside. The bottle looks like fancy glue, yet the label mentions gloves, ventilation and respiratory protection. That caution isn't overkill. Uncured resin and the dust created during finishing are the parts that deserve your attention, especially in a small UK flat.
Learning how to make resin figurines is less about pouring coloured liquid into a cute mould and more about controlling a chain of small decisions. You need a suitable workspace, accurate measuring, a stable mould, patient curing and a cleanup plan that doesn't send hazardous material down the sink. A careful beginner can make durable decorative pieces, but shortcuts usually show up as tacky surfaces, trapped bubbles, warped moulds or cracked details.
Table of Contents
- What You Need Before You Pour Anything
- Choosing the Right Mould for Your Figurine
- Measuring and Mixing Resin the Right Way
- Pouring, Curing, and Demoulding Without Damage
- Trimming, Sanding, and Finishing the Piece
- Working Safely in a UK Home Workspace
- Fixing the Most Common Beginner Mistakes
What You Need Before You Pour Anything
Start with the workspace, not the pigment. A kitchen table can work, provided it's covered with a silicone mat, kept level and separated from food preparation. Open-window ventilation helps, but a small room still needs deliberate airflow, particularly during mixing and pouring. Keep children, pets, food and drink out of the area until liquid resin and contaminated materials have been dealt with.
You'll need a two-part epoxy or polyurethane resin, silicone mixing cups, wooden stir sticks and a digital kitchen scale capable of reading to 0.1 g. Follow the resin manufacturer's instructions rather than assuming every system uses the same ratio. A pressure pot or vacuum chamber is optional, but hobbyists chasing cleaner, bubble-free casts may eventually find one worthwhile.
The safety kit is not negotiable. Use nitrile gloves, eye protection and an organic-vapour respirator suitable for the product and task. A dust mask isn't a substitute for vapour protection during mixing, and vapour protection doesn't replace dust control while sanding. Add mould release spray only when the mould or resin system calls for it, since many flexible RTV silicone moulds usually work without a release coat, as described in UK casting guidance.

Set a realistic pace
A patient beginner is the right skill level. Expect roughly 45 minutes of active work and 12 to 24 hours of curing per piece, depending on the chosen resin and the casting conditions. Those timings come from the practical workflow rather than a promise that every product behaves identically.
A usable UK starter setup may cost roughly £40 to £70, but this is one place where saving a fiver on unidentified resin can create more waste than it prevents. Buy a product with a clear technical data sheet, a stated mixing ratio and instructions for safe handling. UK guidance identifies epoxy resins and hardeners among substances that cause significant skin health problems, so treat the liquid stage as a chemical process, not ordinary craft glue. The UK resin safety data sheet explains why preventing contact matters.
Choosing the Right Mould for Your Figurine
Mould choice should follow the shape you want to cast. A shallow geometric charm has different needs from a standing figure with undercuts, deep eye sockets, thin accessories and a textured base. For most three-dimensional figurines, flexible silicone is the sensible default because you can bend it away from undercuts instead of levering a finished piece out of a rigid shell.
Compare the practical options
Platinum-cure silicone moulds capture fine detail and flex cleanly around complex forms. They're the option I'd choose for repeated figurine casting, especially when the master has ears, claws, clothing folds or other recessed features. They cost more initially, but the cost per successful cast is usually easier to justify when the mould releases reliably.
Pre-made plastic moulds are inexpensive and can be useful for flat charms, simple blocks or shallow geometric ornaments. They're rigid, so detailed sculpts can trap air and resist demoulding. I wouldn't use one for a character figure unless the shape is exceptionally uncomplicated.
DIY silicone moulds make sense once a design has proved itself. Building a snug mould box around a master and pouring condensation-cure silicone gives you control over the shape, but it also introduces more opportunities for leaks, poor support and an awkward split line. A two-stage RTV silicone workflow, followed by a 1:1 polyurethane casting system, is outlined in this UK silicone mould starter kit. That workflow describes room-temperature silicone curing for about 12 hours, with some resin systems ready for demoulding in around 30 minutes. Treat those as product-specific timings, not universal rules.
| Mould Type | Flexibility | Detail Capture | Cost per Cast | Typical Lifespan |
|---|---|---|---|---|
| Platinum-cure silicone | High | Excellent | Low to moderate for repeated use | Durable with proper care |
| Pre-made plastic | Low | Fair on shallow forms | Low for simple shapes | Shorter for detailed work |
| DIY silicone | High | Depends on the master and pour | Can be economical after setup | Depends on silicone, geometry and handling |
If you're comparing the compact proportions of small gothic resin decorations, think about how the mould would handle narrow gaps and repeated releases. Before each pour, inspect the cavity for tears, stretched edges, dust and leftover cured fragments. Level the mould on a firm base, secure it with Plasticene if it shifts, and pour continuously and low into the cavity. A release spray can help some systems, but don't apply it automatically to silicone without checking compatibility.
Measuring and Mixing Resin the Right Way
Sticky casts usually start before the resin reaches the mould. The reliable habit is simple: measure each component by weight on a scale accurate to 0.1 g, then use the ratio printed by the manufacturer. Some systems use 1:1, others use 2:1, and the ratio may be specified by weight or volume. Don't convert casually. An incorrect proportion can leave the figurine soft, tacky or brittle.
Warm both bottles gently to about 20 to 25°C in a water bath before measuring. Keep water out of the resin and dry the bottles thoroughly before opening them. Cold resin becomes thicker, which makes it harder to combine evenly and gives bubbles fewer chances to escape. Excessive heat isn't a solution either, because a warm mix can cure faster and generate more heat in the mould.
Stir deliberately
Zero the scale, add the first component, tare again and add the second. Transfer the measured resin to a clean silicone cup if the manufacturer's instructions allow it, then stir slowly for three to five minutes. Scrape the walls, base and corners repeatedly. A circular whisking motion may look efficient, but it often folds air into the mixture.
Well-mixed resin looks uniform, without cloudy streaks or ribbons of a separate component. The cup or mixture may feel slightly warmer as the reaction begins. Once stirring is complete, let the resin rest for about one minute so larger bubbles can rise, but don't leave it sitting until it starts thickening.
Practical rule: Accurate measurement beats heroic stirring. If the ratio is wrong, extra mixing won't rescue the batch.
Pour promptly within the product's usable working time. A second clean cup can improve consistency for hobby systems that recommend a double-cup mix, but only if you can transfer without scraping unmixed material from the first cup into the final batch. Keep the whole process calm. Fast stirring, repeated decanting and frantic scraping create more bubbles than they remove.
Pouring, Curing, and Demoulding Without Damage
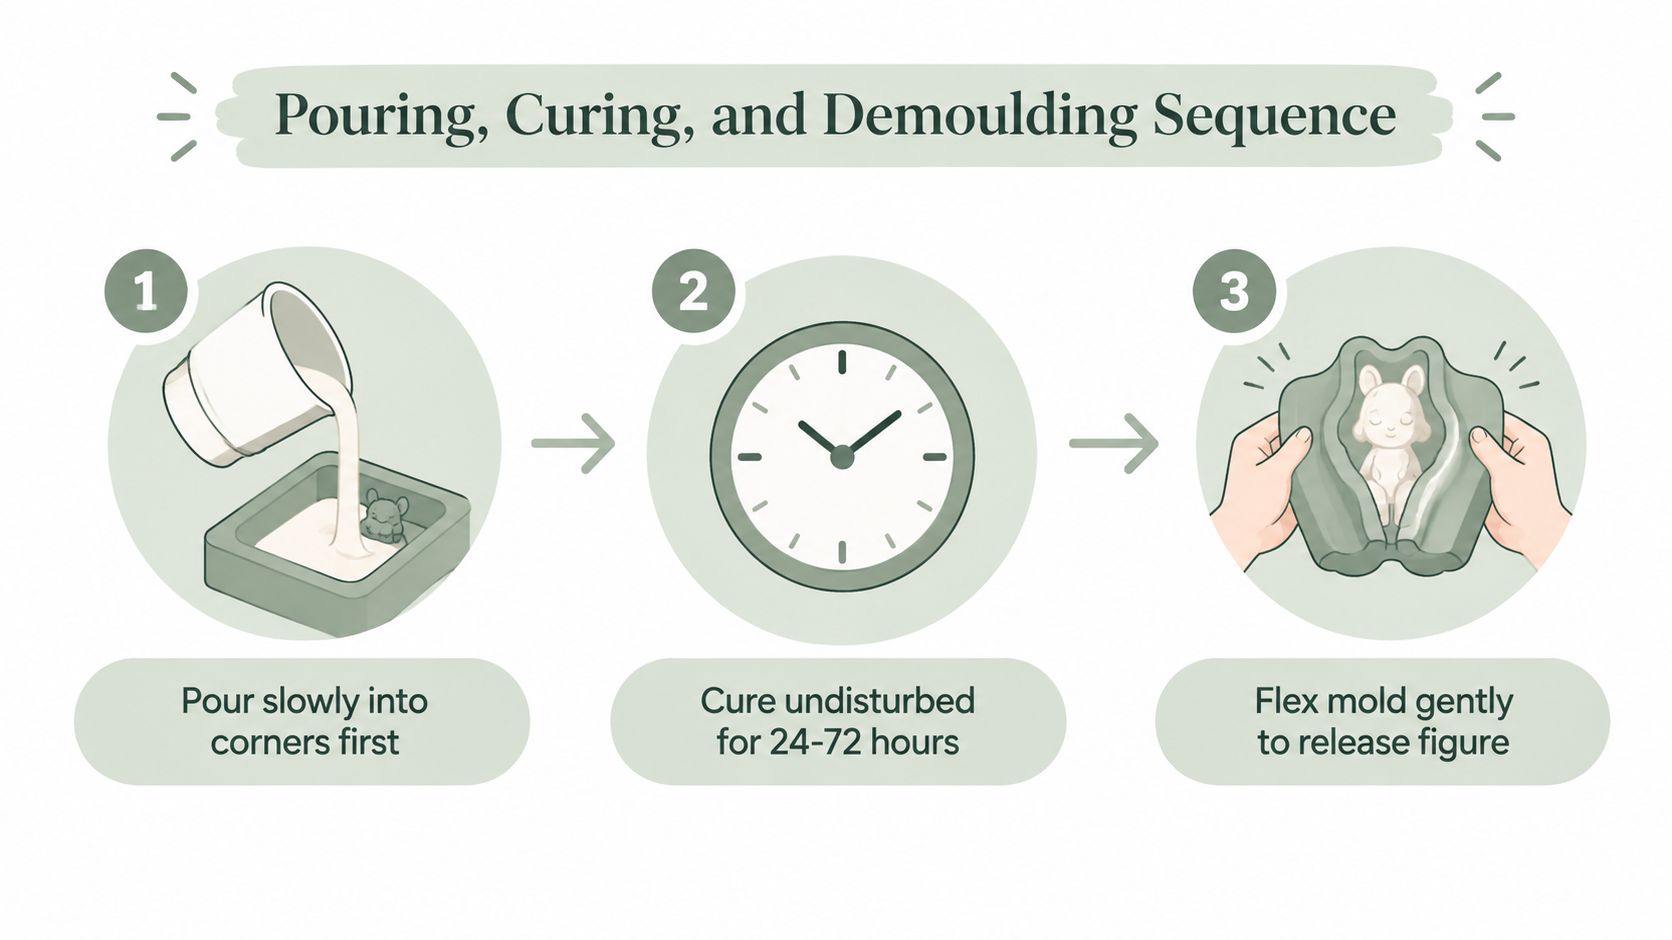
Place the mould on a level, stable surface and check that no wall has bowed inward. Tilt the cup and feed resin into a low corner or along the mould wall, rather than dumping it directly onto the face or the finest detail. Let the resin rise into the cavity. This gives displaced air a better route out and reduces the chance of a bubble sitting across an eye, fingertip or textured edge.
Keep the pour continuous and low. Flexible RTV silicone moulds generally give better results and often don't need a release coat, while an unstable mould can distort the figure before the resin cures. The practical setup advice in detailed UK casting instructions includes securing a mould to a base and ensuring the former is properly covered when making the mould itself.
Curing is a chemical reaction, so room temperature matters. A thicker mass can generate more heat than a thin section, potentially stressing a thin silicone mould or warping delicate details. Leave the filled mould undisturbed, away from direct sunlight and draughts that create uneven conditions. Depending on thickness, resin chemistry and ambient warmth, a surface may feel dry by morning while the centre remains softer and warmer.
Release the casting patiently
A safe demoulding cue is a firm, cool piece that no longer flexes under light pressure. Many hobby casts need 12 to 24 hours before removal, but the manufacturer's cure schedule takes priority. If the mould feels warm or the casting seems rubbery, wait. Popping it out because the surface feels hard is a reliable way to bend thin sections or tear small details.
Start with the deepest undercut. Peel the silicone away from that area, then work around the figure while flexing the mould rather than prising against the casting. Rigid plastic moulds offer far less forgiveness. For compact themed miniatures, such as skeleton and mummy resin figures, gentle pressure matters more than force.
Here's a visual demonstration of the sequence, placed after the pouring guidance so you can compare the hand movement with the written process:
Trimming, Sanding, and Finishing the Piece
A fresh casting is a halfway point, not a finished figurine. Flash, sprue marks and mould lines are normal, and the finishing stage determines whether paint settles cleanly or highlights every rough edge.
Use four controlled passes
- Remove sprues and flash. Use flush cutters for thicker gates, then a sharp scalpel for thin seams. Cut away from your hand and take several light passes instead of forcing the blade through a thick section.
- Dry-sand in sequence. Start around 240 grit, move to 400 grit, then finish with 800 grit where the surface needs clarity. Use a small sanding block on flat areas. It keeps the abrasive face controlled and stops your fingers from creating shallow dips.
- Wet-sand the final areas. Water captures much of the dust and lets you judge the surface more evenly. Keep contaminated water contained rather than tipping it into a sink, because resin particles and liquid residue shouldn't enter household drainage.
- Seal or prime according to the finish. A clear coat can protect an undecorated piece, while primer gives paint a consistent surface. Choose a matte spray for a flatter appearance or a clear finish when you want more sheen, checking that the product is compatible with the cured resin and your ventilation setup.
Dust control: Wet-sand where practical, and wear a fitted FFP2 mask for any dry sanding. Cured resin dust is a respiratory irritant, even though the finished piece feels solid.
Don't skip abrasive grades to save time. Coarse scratches can remain visible beneath paint or clear coat, particularly on smooth bases and rounded faces. Once the part is clean, remove all sanding residue before priming. If you're styling finished pieces alongside other compact home décor, decide whether the final surface should look raw, satin, glossy or deliberately weathered before applying the last coat.
Working Safely in a UK Home Workspace
“Just wear gloves” is incomplete advice. Gloves protect skin from contact, but they don't control vapour, contaminated surfaces, spills or dust. UK Health and Safety Executive guidance identifies epoxy resins and hardeners as major causes of skin health problems and recommends preventing contact wherever possible, using long-handled tools or spreaders, with gloves treated as the last line of defence. The UK safety data sheet is the document to keep with your materials.
Nitrile gloves are generally the practical choice for resin work because they offer better resistance than ordinary latex for many chemical handling tasks. Replace them immediately if torn or contaminated. Goggles protect against splashes, while an organic-vapour respirator is more appropriate for vapour exposure than a simple dust mask. During dry sanding, use the dust protection suited to that task as well.
An open window is useful, but a cracked window alone doesn't guarantee that contaminated air leaves the room. Cross-ventilation works better, and a small extraction fan pointing outwards can improve the airflow. Don't point a fan across the work surface towards your face or across the rest of the flat.
The most common mistake is trusting a room that smells fine. Odour isn't a dependable test of whether exposure is acceptable. Ventilate and follow the product's safety instructions even when you can't smell anything.
Keep waste out of household routes
Uncured resin, resin-contaminated absorbent material and spills need careful handling. UK-facing craft safety guidance describes uncured resin as hazardous and says it shouldn't go down the drain or into general waste. Store waste securely and contact your local council or household waste facility to find the appropriate chemical-waste route. Don't assume every tip accepts the same materials.
Fully cured offcuts are a different category, but only put them into normal household rubbish once they're completely cured and free from liquid residue. Keep contaminated gloves, cups and wipes separate while the resin is still uncured. Packaging obligations are also changing, with Producer Responsibility Obligations for packaging taking effect from 1 January 2026, as noted in UK resin materials guidance. Check current local and national instructions rather than relying on an old craft tutorial.
| PPE Item | Minimum Standard | Why It Matters |
|---|---|---|
| Nitrile gloves | Chemical-resistant, replaced when contaminated | Reduces skin contact with uncured resin |
| Eye protection | Sealed or close-fitting goggles | Helps prevent splash injuries |
| Respirator | Organic-vapour rated for mixing, suitable dust protection for sanding | Handles different exposure risks |
| Work surface protection | Silicone mat or disposable barrier | Makes spills and cleanup more controllable |
| Ventilation | Open window with outward airflow or cross-ventilation | Reduces stagnant contaminated air |
UK consumer safety adds another decision before you sell. The UK guidance for sellers of resin crafts explains that finished consumer products can fall under the General Product Safety Regulations 2005, while uncured resin sold to the public may require CLP labelling. If a figurine is designed or clearly intended for play by children under 14, it becomes a toy under the Toys (Safety) Regulations 2011, with EN 71 testing and UKCA marking requirements. Decide whether your piece is adult décor, a craft item or a toy before production.
Fixing the Most Common Beginner Mistakes
Resin problems often appear at the mould or finishing stage, but the cause starts earlier. A sticky face may be blamed on the mould when the actual issue was an inaccurate ratio. A bubble in a cheek may look like a finishing defect when the pour was too cold or too fast. Diagnose the stage of origin first, then change one variable on the next batch.
Five faults worth diagnosing first
Sticky or tacky cure. Ask whether both components were measured according to the manufacturer's ratio and mixed thoroughly from the walls and base. Cold resin, under-mixing or leaving the combined batch too long before pouring can all contribute. The simplest next test is a small, accurately weighed batch, warmed gently to working temperature and stirred slowly for the full recommended time.
Surface bubbles. Check the mould temperature, pour speed and cavity shape before buying more equipment. A cold mould and a fast pour trap air, while moisture can create problems in some polyurethane systems. Pour into a corner, keep the stream low, and let the resin rise through the detail. A pressure pot or vacuum chamber can help hobbyists chasing clearer casts, but it won't correct a poor mix or damp material.
Warped mould or distorted casting. Look at the mould support and the heat generated by the pour. Thin silicone walls can bow if they aren't secured, while a thick mass can become exothermic and stress the mould or delicate casting. Level the mould on a firm base, secure it with Plasticene where needed and avoid pouring an unnecessarily large volume in one aggressive batch.
Yellowing over time. Ask whether the piece has been exposed to strong UV light and whether the resin surface was properly cleaned before finishing. Some inexpensive resins yellow more readily, and leftover amine blush can interfere with a clear coat. Keep display pieces away from direct sunlight and test the chosen resin and topcoat together before committing to a larger run.
Brittle or cracked sections. Start with the geometry and cure conditions. Thin fingers, weapons and unsupported projections place more stress on a casting than a broad base. A resin intended for a different type of casting, a cold room or an incompatible hardener can make the result worse. Strengthen fragile master details, use the correct resin system and allow the piece to cure fully before flexing or sanding it.
| Symptom | Likely Stage of Origin | First Fix to Try |
|---|---|---|
| Sticky surface | Measuring or mixing | Recheck the stated ratio and mix slowly while scraping the cup |
| Bubbles across detail | Mould preparation or pouring | Warm the materials to working temperature and pour into a low corner |
| Warped mould | Setup or heat control | Support the mould and reduce unnecessary pour thickness |
| Yellowed finish | Resin choice, exposure or coating | Test a better-suited resin and keep finished pieces out of direct sunlight |
| Brittle or cracked parts | Design or curing | Reinforce thin details and allow a complete cure before handling |
A checklist you can screenshot
Before the first pour, run through this without trying to improvise:
- Pre-pour setup: Cover the work area, prepare and level the mould, and bring resin and mould towards 20 to 22°C.
- Safety: Put on nitrile gloves and goggles. Crack the window or set the extraction fan to move air out. Use the appropriate respirator for vapour exposure and a fitted FFP2 mask for dry sanding.
- Mixing: Zero the scale, measure by weight, follow the manufacturer's ratio and stir for at least two minutes while scraping the walls and base. Continue for the product's full recommended mix time, then use a second cup if the system calls for it.
- Curing: Set a timer for 24 hours, keep the mould away from direct sunlight and don't demould while the centre still feels warm or flexible.
- Finishing: Trim flash with flush cutters, control dust during sanding, clean the surface and seal or prime the piece.
The checklist is deliberately plain. Good casts come from repeatable habits, not from rescuing a bad batch with more heat, more pigment or aggressive demoulding.
Once the basics feel predictable, the hobby can grow into colour work, batch casting, master sculpting, mould making or small decorative runs. Keep a note of the resin system, ratio, room conditions and result after each pour. That record turns disappointing casts into useful process knowledge.
Mystic Harmony specialises in compact seasonal and culturally inspired décor, including playful Halloween and gothic resin miniatures suited to desks, shelves, cars and small display setups. If you'd rather style a finished collection while you practise your own casts, visit Mystic Harmony to explore small display-ready pieces and giftable décor.
Enhanced by the Outrank tool